Faller Circus Kits
I absolutely love the Faller circus kits for HO layouts! I have built 5 of them so far and have 3 more to put together. What I want to say here is some wisdom regarding the construction of these kits.
First of all, let me say that the ingenuity of the designers is profound. They have managed to create an experience that is both challenging and fun, while at the same time giving a result that functions in most cases quite well. I do want to add here that myopia is a real advantage and if the user is not near-sighted, the challenge of some kits may be pretty high. There are parts involved that are so small they are extremely hard to see at normal distances, such as brass screws only 3 mm long. But patience and determination will triumph if you are careful. But be sure to purchase, if you don't already have one, a good quality mechanical tweezer.
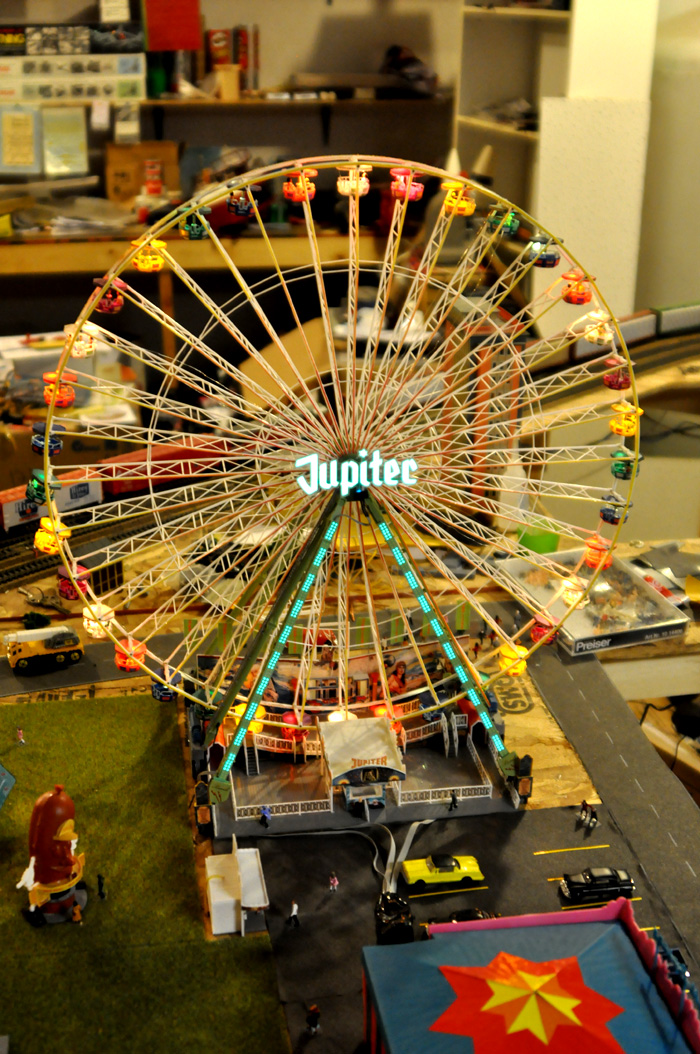
Most of my comments here are directed at the Roller Coaster but I want to mention first, one detail about the Jupiter Ferris Wheel.
|
|
The instructions do say that the wheel must be flat but I made the mistake of forcing the spokes on one side to run into the
center when gluing them in place, which caused the wheel to warp slightly. It only takes a quarter inch of warp to cause problems.
When the wheel rotates, that quarter inch of warp will cause the rim to ride up on the drive wheel and slip over the edge, which
results in a stoppage of rotation as well as friction between the cars and the mounting braces at the bottom. So be sure to make
the wheel absolutely flat when gluing the parts together. And do buy the lighting kit - it adds so much to the final result.
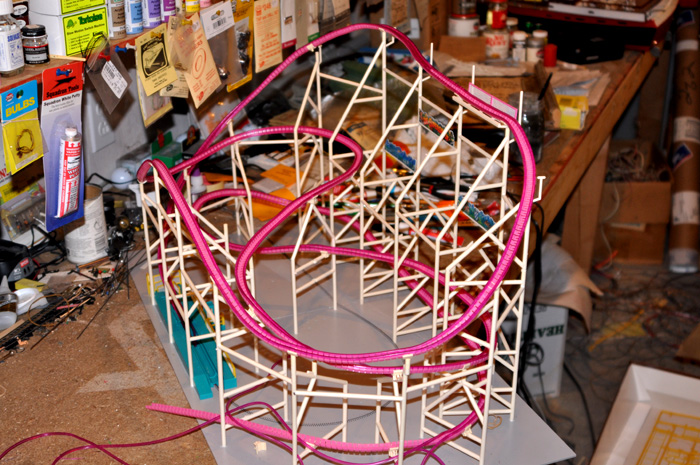
Regarding the roller coaster, kit number 451, I have much to say. First of all, you will need super glue - cyanoacrylate. Now,
Faller calls this Faller Expert Rapid plastic cement. This is mis-leading, especially since the only photo of their cement on the
first page of the instruction book shows a plastic cement which is obviously NOT super glue. While the parts in this kit are
almost all plastic, some of them cannot be glued with ordinary plastic cement, notably the track inner and top 'rails'.
My first warning comes from page 3 of the booklet: don't put any rails on the track yet! It is tempting to do this but you must
not. Also, be sure to debur the track where it was attached to the plastic framework in the kit. If you don't carefully remove
all the tiny plastic burrs along the top edge of the track, you will not be able to push down the 'running sections' of rail where
the cars' steel wheels ride upon.
Second warning: page 9, putting the grating gauze on the railings - the sides of the railings are not homogeneous. The grating
gauze goes only on
the side with a slight indent around the railing. Then the 'holding' piece will slide into this indent and hold the
gauze in place
where it belongs. This may seem obvious but the indent is very hard to notice and if you put the gauze on the
wrong side, the result will not look right, as well as the gauze will tend to fall out easily.
My next warning is on page 11: The instructions tell you to install the railings on the platform before gluing the platform to the
coaster base. I recommend that you wait with the railings because it will be much easier to install the track in the platform
before the railings are in place. It is a bit more difficult to install the railings later but it will be much easier to glue the track
in place without them in the way and the extra difficulty of gluing the railings in place later is more than offset by the ease of
installing the track without the interference of the railings. Another warning on page 11: Parts number 12/9
(there are 2) are
installed on the platform where the cars engage the driving coil which hauls them up the first part of the track to the top of
the coaster. These parts will rub the cars if they are glued exactly in place where shown. Move each one back from the track
about 1 mm. This will allow enough room for the cars to slide by without rubbing, which would otherwise cause them to stop.
Next warning is on page 13: installing the high platform (part 17/1) on top of the coaster. There is no mention of this fact in
the booklet: it must be put in place only ONE WAY! There is a very small indent on one side of this platform where the
railing is attached and if you don't see that indent and glue the railing on the wrong side, the platform will then be installed
backwards on the coaster and the cars will then rub against the railing when they reach this point, causing them to stop.
Examine this platform carefully to see where the railing is attached and glue the railing in that indent, followed by gluing the
platform in place with the proper sides forward and back, allowing the cars to slide by easily.
Now a minor recommendation: on Page 14, where the installation of the last two uprights are shown being installed. I suggest
that you leave these off till later. It will be much easier to install the first part of the track in the loading platform without
these uprights in your way. You can easily glue them in place after the first part of the track has been laid.
Now the most important warning of all: on page 16, you begin adding what Faller calls 'section parts' and 'running sections'
to the track. I choose to call these things innner rails and top rails for the track. Both are plastic but are a different kind of
plastic than most of us are used to working with in kits of this kind. You must use super glue here! Ordinary plastic
cement simply will not work on these. Both are necessary because the inner rails hold the driving coil down in the bottom of
the track while the top rails are what the steel wheels under the cars ride on. But here is the most important warning of all:
Don't under any circumstances put more than a couple of inches of these in place before installing the track.
Just glue a couple of inches of both rails in place, then attach the start of the track to the loading platform, then install the
entire track around the entire coaster framework before adding the rest of the rails. The reason is simple: if you put the rails
in place first, you will NOT BE ABLE TO BEND THE TRACK TO ITS DESIRED SHAPE! So put the track down all the way
around the coaster, then begin adding the rails, inner ones first, and then the top ones along the top edges of the track.
Work slowly and carefully, putting down a few inches of inner (and later the top rail) railing at a time, using only super
glue. You will find that the track becomes quite rigid after these railings are installed so be sure that the track is glued in
place on the supports before hand and is in approximately the correct shape. You will want to tip it over quite radically on
the bottom of the steep curves to prevent the cars from flying off when they run.
Now a warning on Page 19 - installing the motor. It may not have enough torque to turn the car lift coil. Mine did not!
Try it if you wish but be advised that I not only lubricated the coil with oil but actually re-built the entire lift section
of the track one time to make sure that the rails along the sides were perfectly installed. And the motor simply froze
when I tried to test the lift mechanism. I was able to turn the coil manually, but found that it required substantial
torque, more than the motor could supply.
I suspect that most of you will also need a motor with more torque. They are
available on line at a variety of locations for reasonable prices. Don't get too big a motor or you will need both a more
powerful transformer and you might in some cases distort or bend the lift coil beyond repair.
Now the last warning: the instructions say to install the top rail (Faller calls this 'running sections') with about 8 cm of
extra length beyond the start of the track. This is so that a like amount may be added to the end of the track on the other
side of the loading platform. You can do this, or you can simply make it more like 15 cm at the start and only a tiny amount
extra at the end - whichever you wish. But be sure that you push these running sections (what I call top rails) down on the
almost invisible ridge of plastic inside the bottom of the loading platform. This small ridge is an extension of the top edge
of the track itself and the rails must be pushed down on this ridge or they will move outward very slightly against the inner
side of the
platform bottom. If that happens, the cars will drop down too low and will not move through the platform without
rubbing
on the sides and stopping.